Doorbell Butler
Smart doorbell with notifications and a custom jingle played on Google devices throughout the house
My house didn’t have a doorbell when I moved in so I made my own! Instead of the traditional “ding dong” it plays a jingle written by my friend Nick Dahlquist throughout my house on Google Home devices.
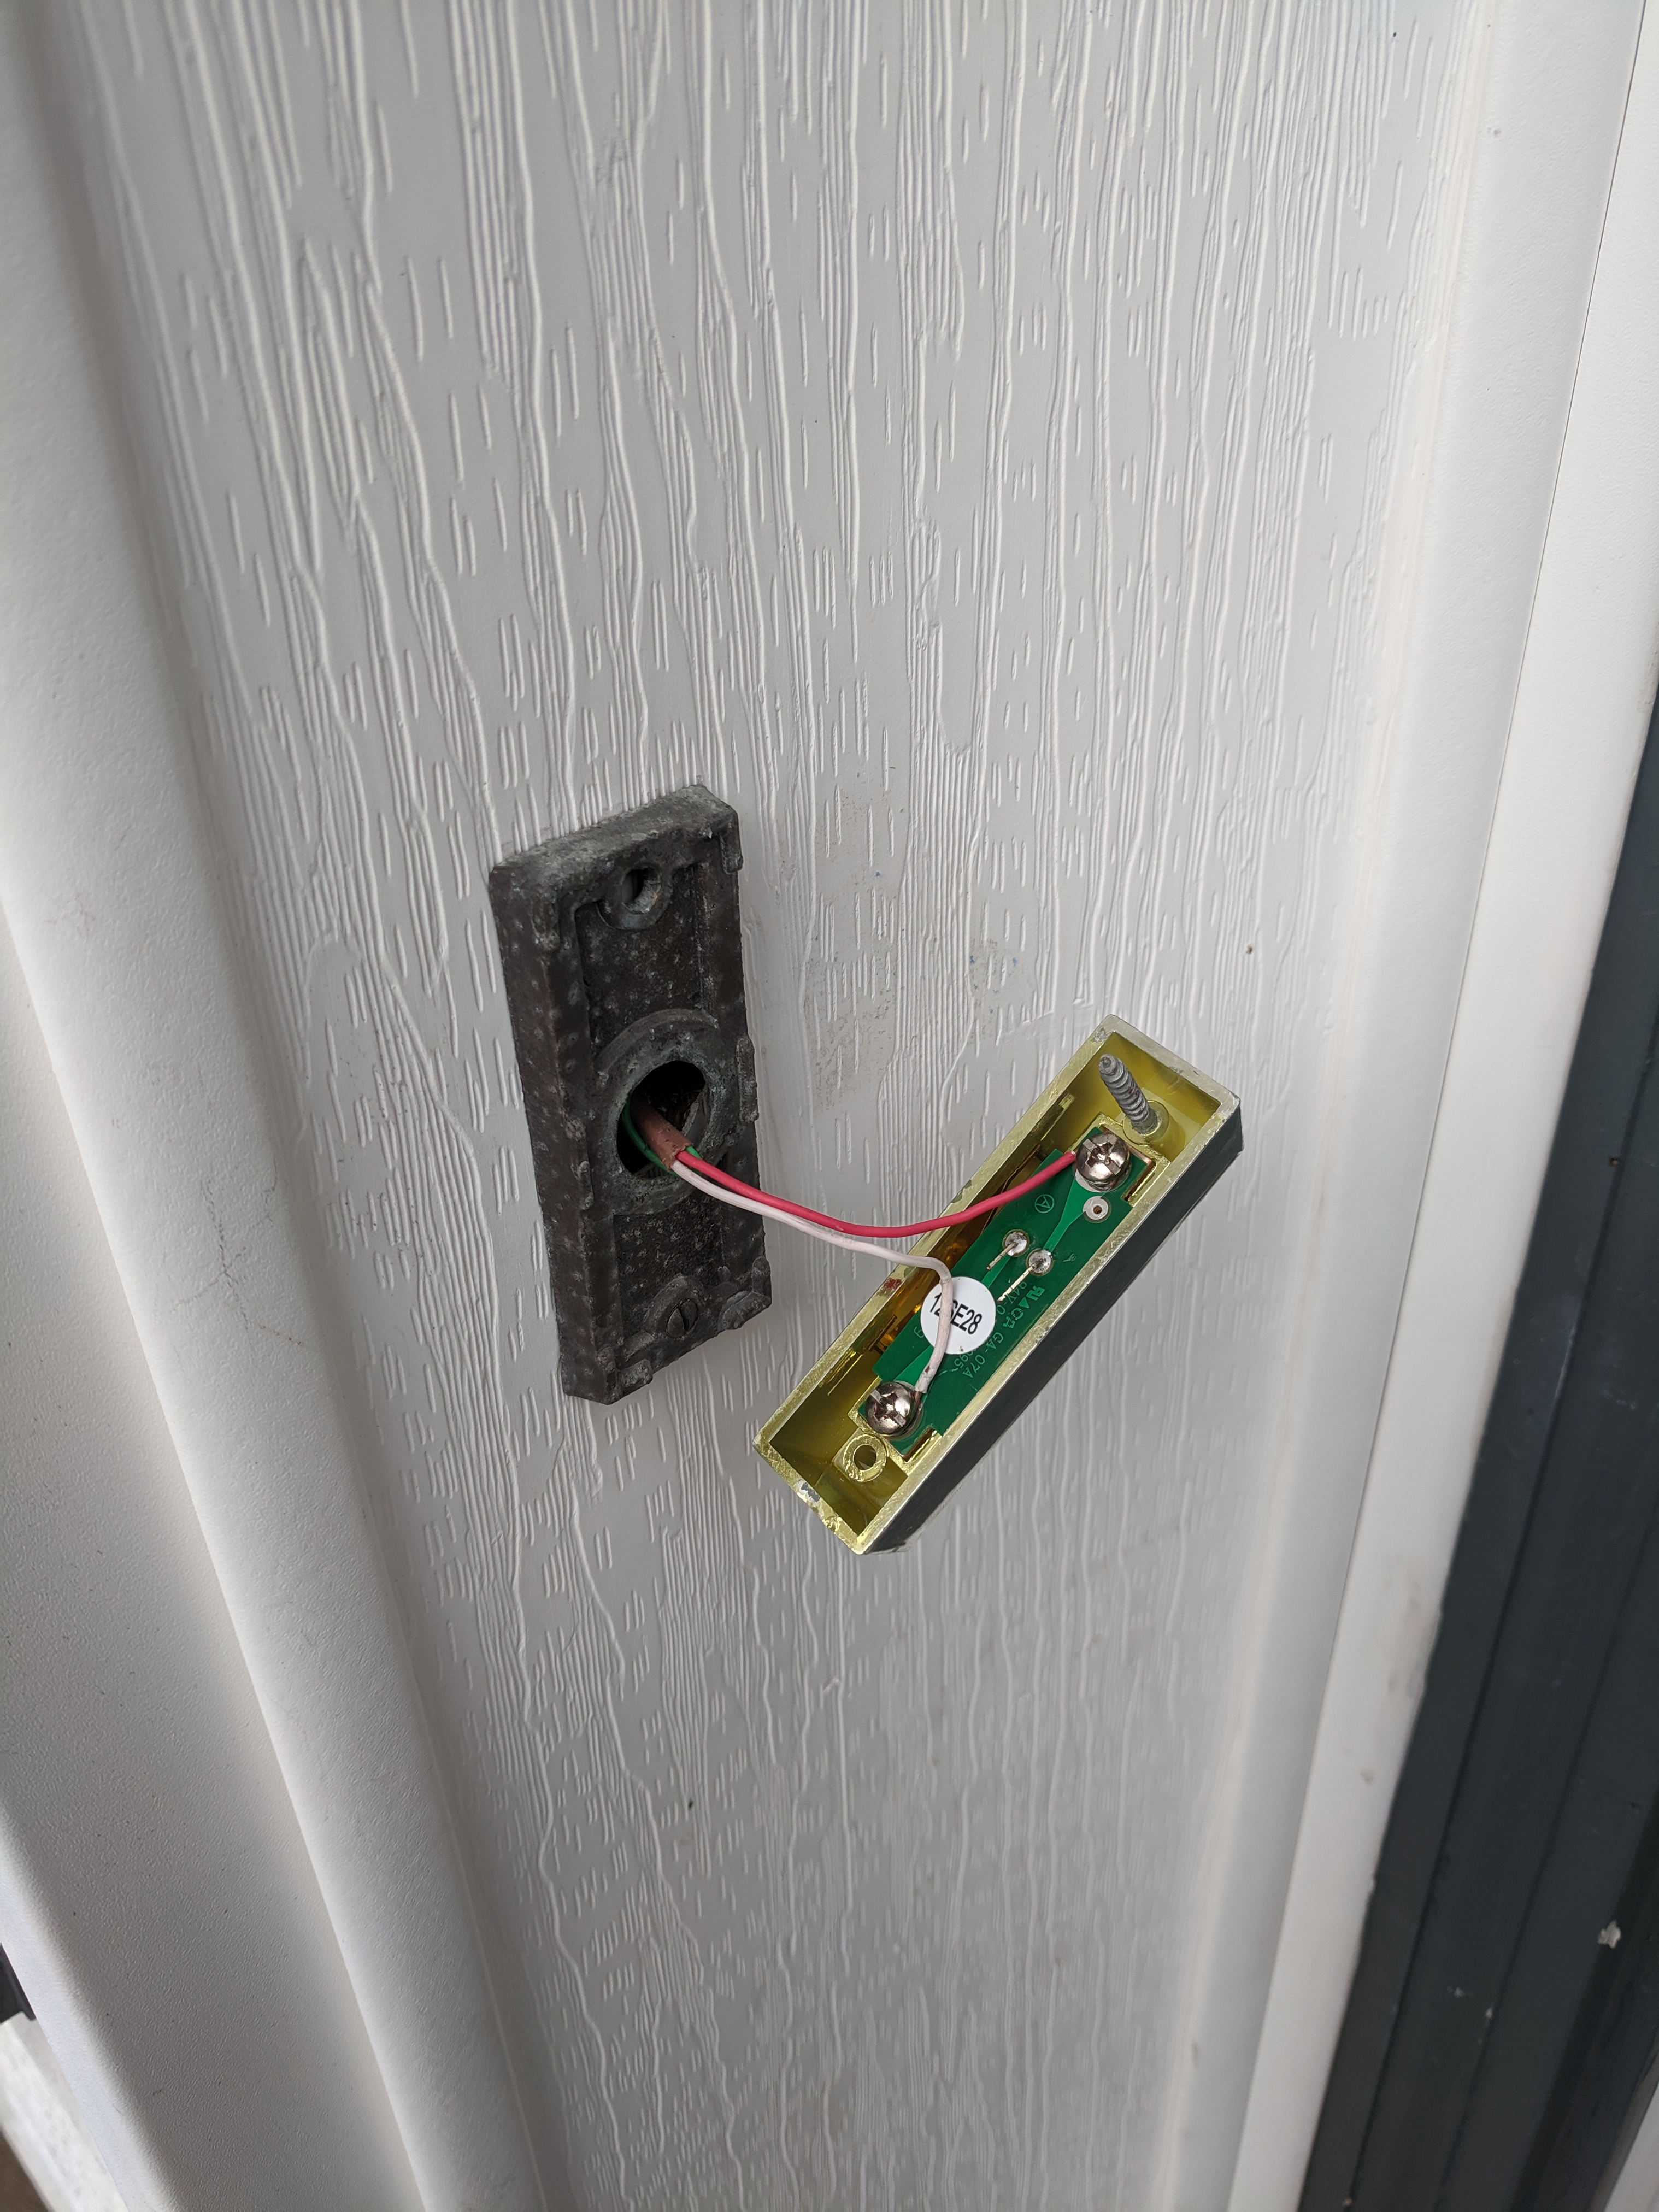
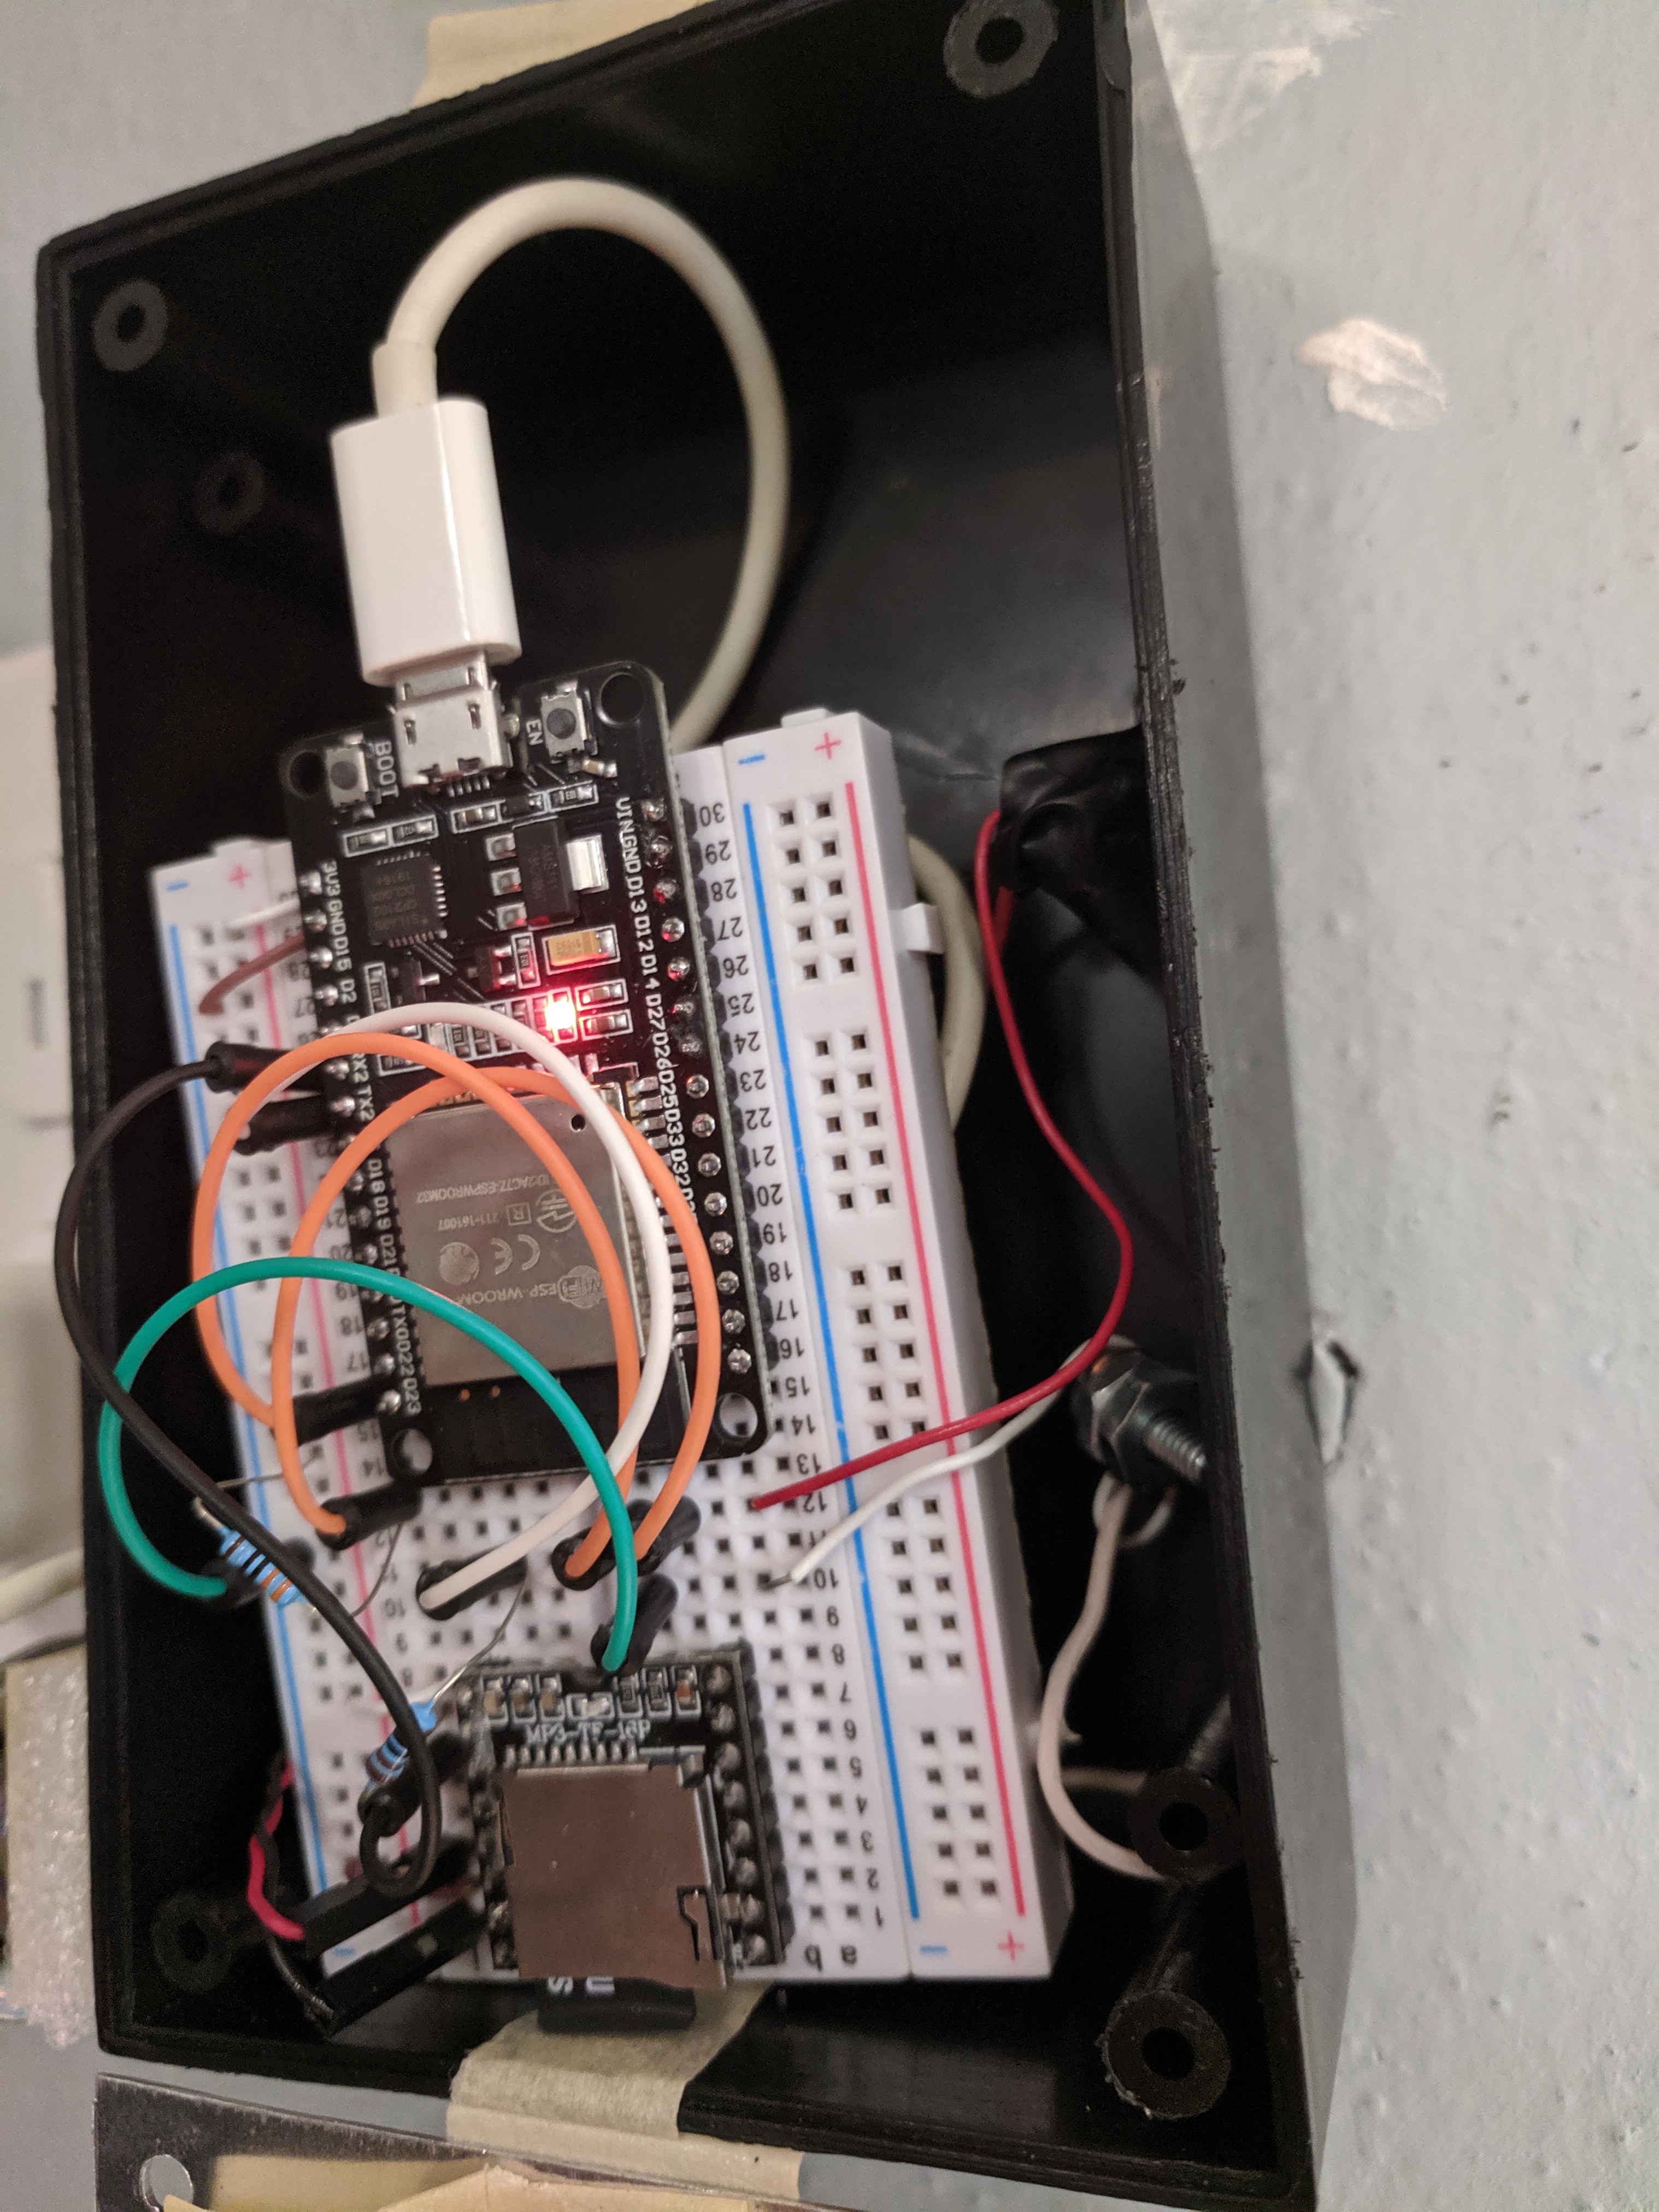
The doorbell button is attached to an ESP32 which is connected to my WiFi. I also setup a few Docker containers on a Raspberry Pi to help with the automation.
ESP32
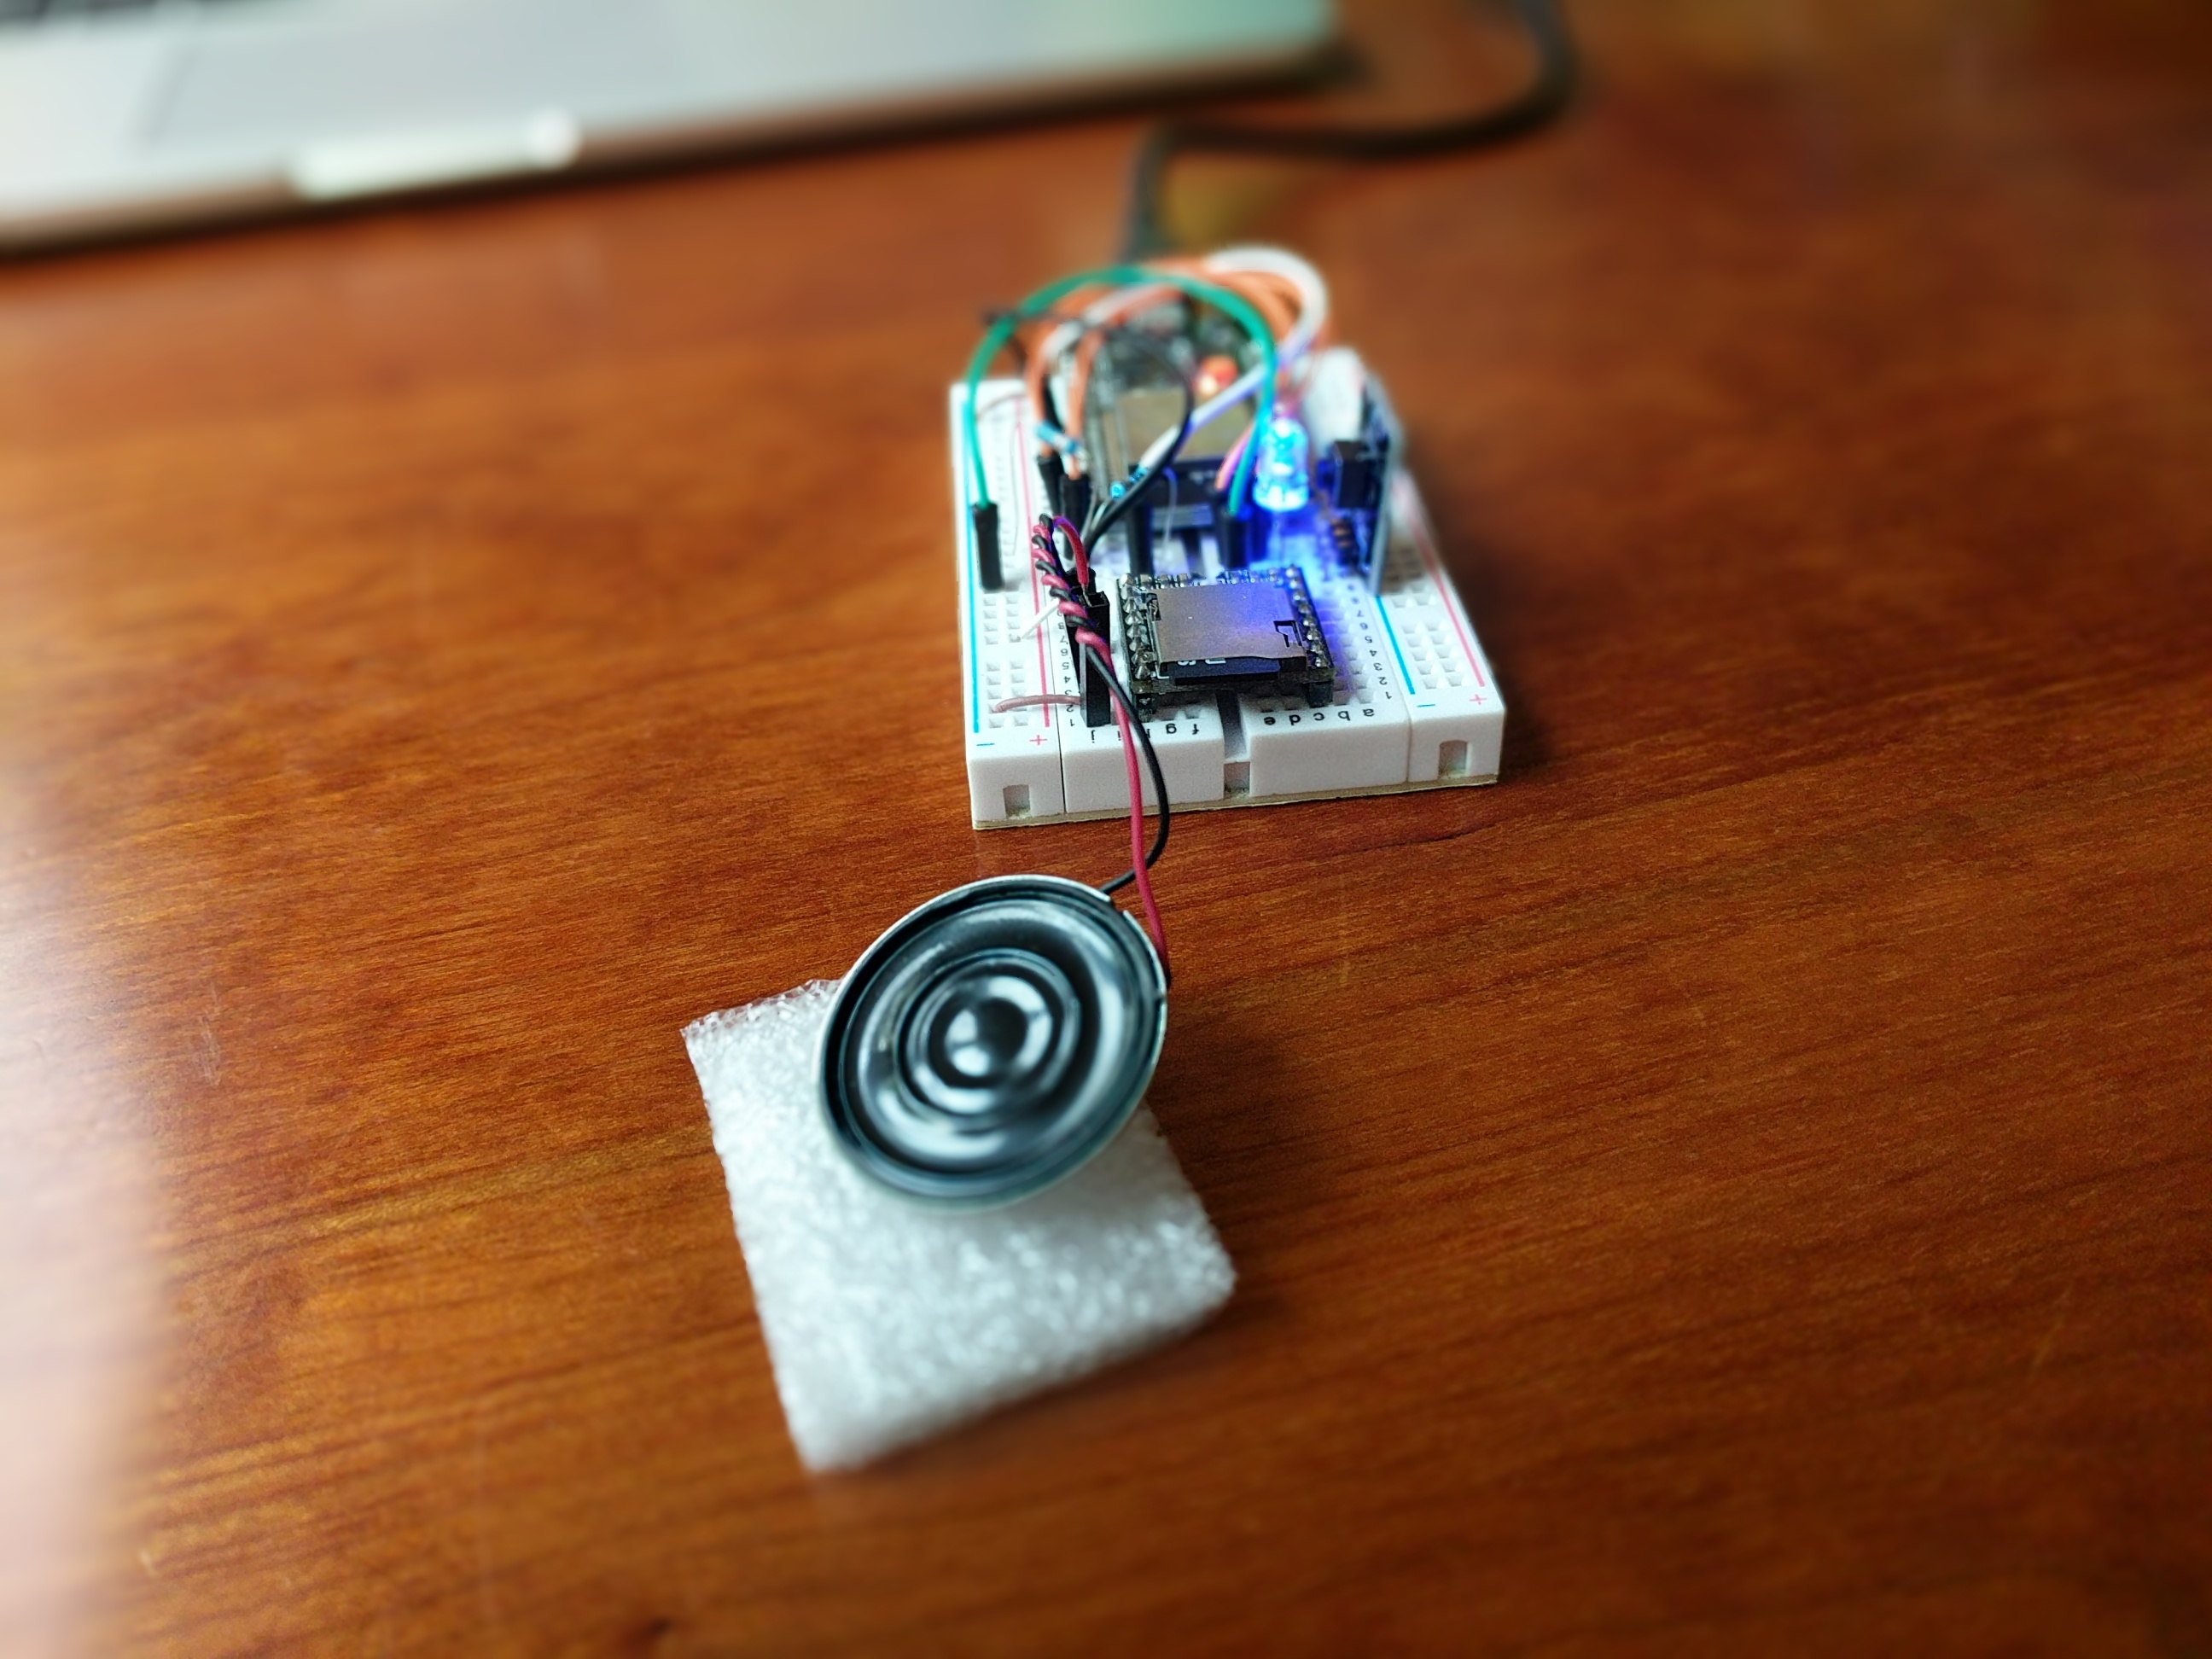
The first piece of this project is the WiFi connected microcontroller which uses MQTT and a tiny speaker to indicate when the doorbell button has been pressed.
Circuit design
To read the state of the button, I used a pull-up resistor to make the input pin’s value HIGH by default.
SparkFun explains pull-up resistors the best so why reinvent the wheel.
With a pull-up resistor, the input pin will read a high state when the button is not pressed. In other words, a small amount of current is flowing between VCC and the input pin (not to ground), thus the input pin reads close to VCC. When the button is pressed, it connects the input pin directly to ground. The current flows through the resistor to ground, thus the input pin reads a low state. Keep in mind, if the resistor wasn’t there, your button would connect VCC to ground, which is very bad and is also known as a short.1
I put the MP3 of my friend Nick singing on an SD card which I can plug directly into the DFPlayer Mini module. The DFPlayer is controlled through a serial connection which has
Firmware
In the firmware setup, I set pin 23 as an input and I initialize the module used to play sound by specifying serial TX/RX pins. Next, I connect to my house WiFi network and establish a connection with the Raspberry Pi’s MQTT broker. After that’s all done I publish something todoorbell/status just so I can keep track of the device’s status.
The ESP32’s loop checks on WiFi and MQTT connections and reads pin 23’s value. When the button is pressed and it reads LOW, I publish a message on doorbell/ring and tell the DFPlayer to play the only MP3 on the inserted SD card.
#include <WiFi.h>
#include <PubSubClient.h>
#include <DFRobotDFPlayerMini.h>

#define BUTTON_PIN 23

const char* ssid     = "network-name";
const char* password = "network-password";
const char* mqtt_server = "mqtt.broker.ip.address";
const char* mqtt_username = "mqtt-username";
const char* mqtt_password = "mqtt-password";

WiFiClient espClient;
PubSubClient client(espClient);

HardwareSerial dfSerial(2);
DFRobotDFPlayerMini dfPlayer;

long lastRing = 0;
unsigned long checkWifi = 30000;
unsigned long checkMqtt = 30000;

void setupWifi() {
  Serial.println("Connecting to WiFi network: " + String(ssid));

  WiFi.begin(ssid, password);

  Serial.println();
  Serial.println("WiFi connected!");
  Serial.print("IP address: ");
  Serial.println(WiFi.localIP());

  randomSeed(micros());
}

void setupMqtt() {
  client.setServer(mqtt_server, 1883);
  client.setCallback(callback);

  reconnectMqtt();
}

void reconnectMqtt() {
  String clientId = "doorbell-";
  clientId += String(random(0xffff), HEX);

  if (client.connect(clientId.c_str(), mqtt_username, mqtt_password)) {
    client.publish("doorbell/status", "Hello!");
    client.subscribe("doorbell/ping");
  } else {
    Serial.println("Connection to MQTT failed. Trying again in 5 seconds!");
    delay(5000);
  }
}

void setupDfplayer() {
  dfSerial.begin(9600);

  Serial.println("Dfplayer connecting...");

  if (!dfPlayer.begin(dfSerial)) {
    Serial.println("Dfplayer connection error!");
    while(true);
  }

  dfPlayer.volume(25);
}

void setup() {
  Serial.begin(115200);

  pinMode(BUTTON_PIN, INPUT);

  setupDfplayer();
  setupWifi();
  setupMqtt();
}

void callback(char* topic, byte* payload, unsigned int length) {
  char s[20];
  sprintf(s, "%u", millis());
  client.publish("doorbell/status", s);
}

void loop() {
  long now = millis();

  if ((WiFi.status() != WL_CONNECTED) && (now > checkWifi)) {
    Serial.println("Disconnected from WiFi. Waiting 30 seconds!");
    setupWifi();

    checkWifi = now + 30000;
  }

  if ((!client.connected()) && (now > checkMqtt)) {
    Serial.println("Disconnected from MQTT. Waiting 30 seconds!");
    reconnectMqtt();

    checkMqtt = now + 30000;
  } else {
    client.loop();
  }

  if (digitalRead(BUTTON_PIN) == 0 && now - lastRing > 2000) {
    lastRing = now;

    client.publish("doorbell/ring", "Ding dong!");
    dfPlayer.play(1);
  }
}
“Ding Dong”
Initially, I used a DFPlayer mini module to play the mp3 from an SD card on tiny connected speaker. But this wasn’t entirely effective because the speaker wasn’t audible throughout the entire house.
So instead I used Home Assistant to play the mp3 on both of my Google Home devices (one on each floor). The mp3 is locally served by a Raspberry Pi.
Raspberry Pi server
This project relies on three Docker containers running on a Raspberry Pi 3 in my house:
- MQTT broker eclipse-mosquitto
- Home Assistant instance raspberrypi3-homeassistant
- Apache HTTP server httpd
I created these containers with the follow docker-compose.yml:
version: '2.1'
services:
  mosquitto:
    container_name: mosquitto
    image: eclipse-mosquitto
    user: "1000:1000"
    ports:
      - 1883:1883
    volumes:
      - /etc/localtime:/etc/localtime:ro
      - /opt/mosquitto:/mosquitto/config:ro
      - /opt/mosquitto:/mosquitto/log
      - /opt/mosquitto:/mosquitto/data
    restart: on-failure
  homeassistant:
    container_name: homeassistant
    image: homeassistant/raspberrypi3-homeassistant:latest
    network_mode: "host"
    volumes:
      - /opt/homeassistant:/config
      - /etc/localtime:/etc/localtime:ro
    restart: on-failure
    depends_on:
      mosquitto:
        condition: service_started
    healthcheck:
      test: ["CMD", "curl", "-f", "http://127.0.0.1:8123"]
      interval: 30s
      timeout: 10s
      retries: 6
  http-server:
    container_name: http-server
    image: httpd
    ports:
      - 80:80
    volumes:
      - /opt/http-server/www:/usr/local/apache2/htdocs:ro
    restart: always
MQTT Broker
First off, we’ve got the broker to which the ESP32 publishes and Home Assistant subscribes. It’s configuration is pretty straightforward — I used the default port (1883), told it to write logs to the volume Docker provided, and setup authentication to limit the ability to subscribe and publish to any old topic.
Home Assistant
The Home Assistant instance has an automation which subscribes to the doorbell/ring topic and performs a few actions when a message is received. First, it calls the Telegram and IFTTT APIs which sends notifications to our phones. Then it connects to my Google Home devices and instructs them to play the MP3 hosted on the Pi.
Here’s the Home Assistant automation configuration:
id: doorbell_ring
alias: Doorbell alerts
trigger:
- platform: mqtt
  topic: doorbell/ring
action:
- service: notify.telegram
  data:
    message: Someone is here for you.
    title: Ding dong!
- service: ifttt.trigger
  data:
    event: doorbell_ring
    value1: Ding dong!
- service: media_player.turn_on
  data:
    entity_id: media_player.living_room_speaker
- service: media_player.play_media
  data:
    entity_id: media_player.living_room_speaker
    media_content_id: http://rpi.ip.address/doorbell.mp3
    media_content_type: audio/mp3
- service: media_player.turn_on
  data:
    entity_id: media_player.basement_speaker
- service: media_player.play_media
  data:
    entity_id: media_player.basement_speaker
    media_content_id: http://rpi.ip.address/doorbell.mp3
    media_content_type: audio/mp3
Apache HTTP Server
Lastly, we’ve got the Apache server which hosts a single file: the custom jingle. It’s serving on port 80 so Home Assistant can just provided the IP address of the Pi and the name of the MP3. This required zero configuration aside from placing the file in www directory.